ADO.Net consists of a set of objects that help you connect to, retrieve and manipulate data from databases. It the most code intensive way to do these tasks (LINQ and ADO Data Entities do most of the same things with much less code) but it does give you the most control over all the aspects of your data.
This example may seem complex, but I will guide you through it, and your assignment will parallel it very closesly.
Preparing SQL Server
For this example we will use the CommunityAssist database. We will have to do some preparation first. For one thing, CommunityAssist doesn't have a login table. First we will add one. We are going to do the passwords in plain text--a very bad idea--but there are enough complexities in this example for now. Ask me later and I will show you how to hash passwords both in Visual Studio and SQL Server.
The easiest way to do this is to open the SQL Server Management Studio and open a new query. Then enter this code.
use CommunityAssist

Create table DonorLogin
(
 loginId int identity(1,1) primary key,
 PersonKey int Foreign Key references Person(personKey),
 LastName nvarchar(255),
 DonorPassword nvarchar(255)
)
Go
Insert into DonorLogin(PersonKey, LastName, DonorPassword)
Select p.PersonKey, LastName, substring(LastName, 1,1) + 'pass'
From Person p
inner join Donation d
on p.PersonKey=d.PersonKey
You can select from DonorLogin to see what the table contains
Now we need to make some additional adjustments to the Database and the Server. We are going to add two new SQL Server Logins and then we have to change the security mode of the server to accept both SQL Server and Windows logins.
Enter the following SQL
Create login DonorsLogin with password='P@ssw0rd1', default_database=CommunityAssist
Create user DonorsLogin for Login DonorsLogin
Grant Select on DonorLogin to DonorsLogin

Create Login RegisteredDonorsLogin with password='P@ssw0rd1', default_database=CommunityAssist
create user RegisteredDonorsUser for Login RegisteredDonorsLogin
Grant Select on Person to RegisteredDonorsUser
Grant Select on Donation to RegisteredDonorsUser
Now we need to change the Server authentication mode.
1. In SQL Server Management ServerRight Click on the Server and select properties from the context menu.
2. click Security under select a page.
3. Click the radio button by SQL Server and Windows Authentication mode.
4. Click OK and then OK to the dialog that these changes will not take effect until the server is restarted.
5. Right click on the server again. Choose Restart. Say OK to all the dialog boxes..
6. When the server is restarted you can close the SQL Server Management Studio.
Writing the ADO Code
Open Visual Studio and create a new empty web site. Add Two forms:Default.aspx and Default2.aspx. Ignore them for now.
Add a class called "DonorLoginClass." Click ok on the dialog box that says you need to put it in an "app_code" folder.
First add these two using statements. They call the ADO libraries. The second statement calls the SqlClient library which is specifically designed to work with SQL Server.
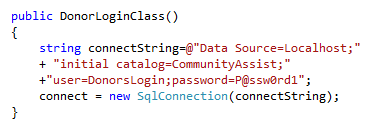
In the class we will declare one private field of a SqlConnection type. A SqlConnection is an ADO object that manages connections to the database.
It takes a connection string as an argument. We will initialize it in the constructor.
Now we will create a public method that will check to see if the login credentials match the values in the database. This method uses the SqlCommand object which is used to pass SQL to the database, and the SqlDataReader object which can be used to read data from the database. The method returns the personkey of the person who is logging in as an integer.

Now open the source view for Default1.apsx. We will add a custom login form. Here is the html, asp code:

Now double click the button in design view to get the default click event. We will add the following code to call the login class and confirm the values. If the login is good we will store the personkey in a Session variable and redirect to Default2 , if not we will put a message in the label.

I am going to put a H1 heading saying welcome on Default2. Now select Default.aspx in the Solution explorer and hit run


Now we will add another class called GetDonor. It has two public methods. The first retrieves the name of the donor and the second gets a DataSet of all the donor's donations. A dataset is an ADO object that contains tables. we will attach the DataSet as a data source for a gridview on the web form. Here is the complete code for the class:

Remember you also have to add the using statements for Data and SqlClient
Now we move to Default2. Add a label and a GridView. (the GridView is in the Data Section of the toolbox.)

We are going to use the Form Load event. First we will check to make sure that the session variable exists, if not we will send it back to the login. Next we will call the get donor class methods to get data to populate or form.

You will also have to add an using statement for System.Data to this page.
Here at last are screen shots of the program running

